Reverse Uno Card - Beginning the descent into the reverse engineering rabbit hole.
Side note: I got the other machine working again. Since the macbook is set up, I’ll incorporate it in some projects.
Reverse Uno Card - Beginning the descent into the reverse engineering rabbit hole.
One of my favorite topics from Advent of Cyber 2020 was reversing (and scripting/programming is in close second). The next series of posts will be a collection of notes related to the topic. Since I’ve used radare2 5 times ever and haven’t touched Ghidra or IDA freeware before, I have quite a long way to go. I will start by walking through the ‘Intro to x86-64’ room on TryHackMe.
Intro to x86-64
The room opens with an description of the flow of how source code is compiled into machine code. In the beginning stages of developing this architecture (the room looks only at intel syntax), Intel had first started with a 16 bit instruction set. 32 bit instruction set came later which led to where it is today, 64 bit. All these instruction sets are backwards compatible which is nice. The flow of data in any of these instruction sets looks like this:
Source code –> compiled into an assembely file (.s file extension) –> assembler converts it into an object program (.o file extension) –> operations with a linker makes it an executable.
The room asks to analyze an executable called intro using r2, since I already have a post with an r2 cheatsheet I won’t duplicate all the commands in this write-up (just know that entering ? gives you a help menu and appending it to a command will help you with that command).
After printing the disassembely function of main for the rooms intro program, the room explains how instructions are structured. In general moving data using registers will look like this:
movq source, destination
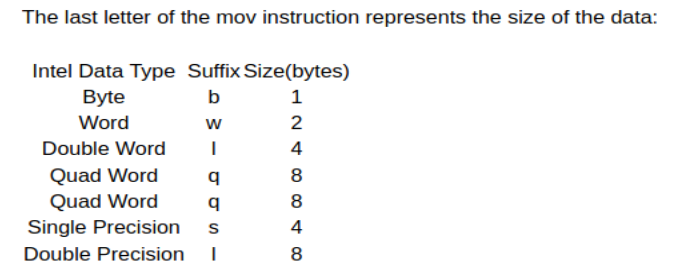
The source is often times a constant which has a “$” as a prefix. The last letter of a move instruction represets the size of the data:
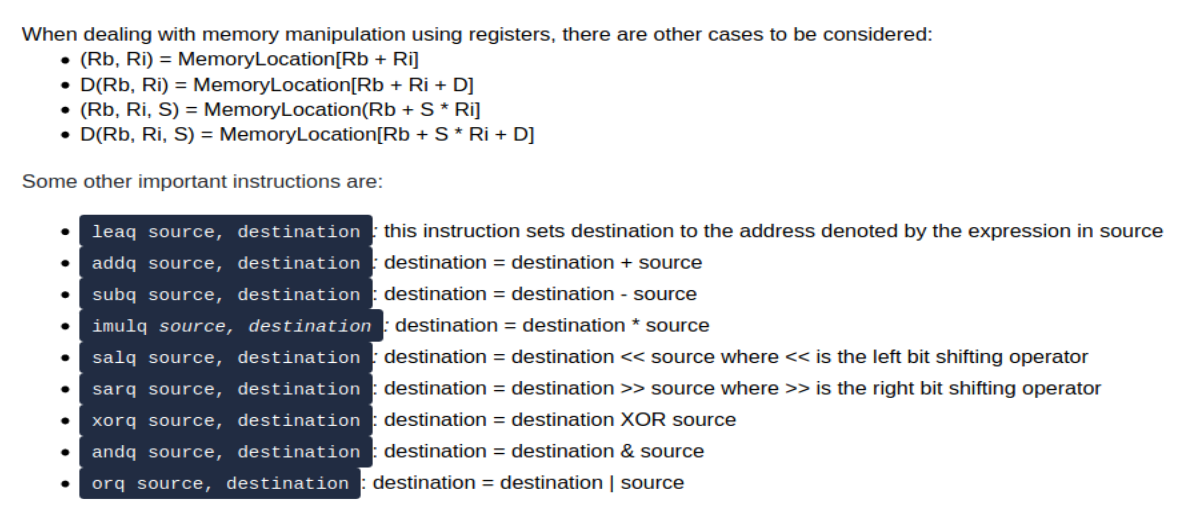
Another important note is how memory manipulation works and some specific assembely instructions:
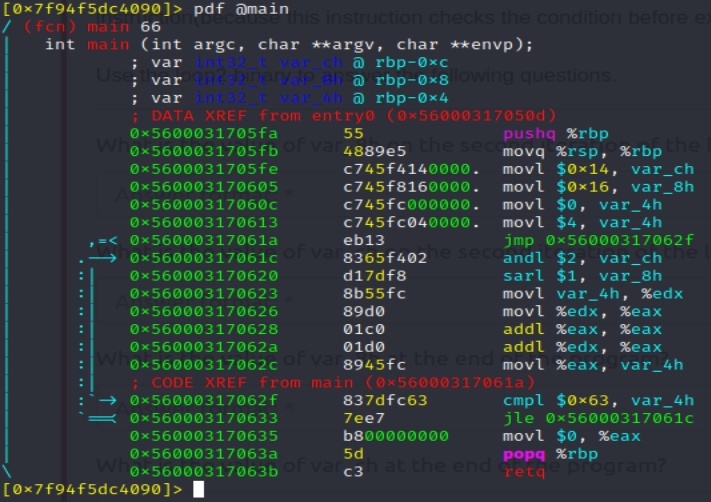
After the basic description of the registers for 64 bit and 32 bit as well as some basic assembely instructions, this room covers how if statements are handled in assembely:
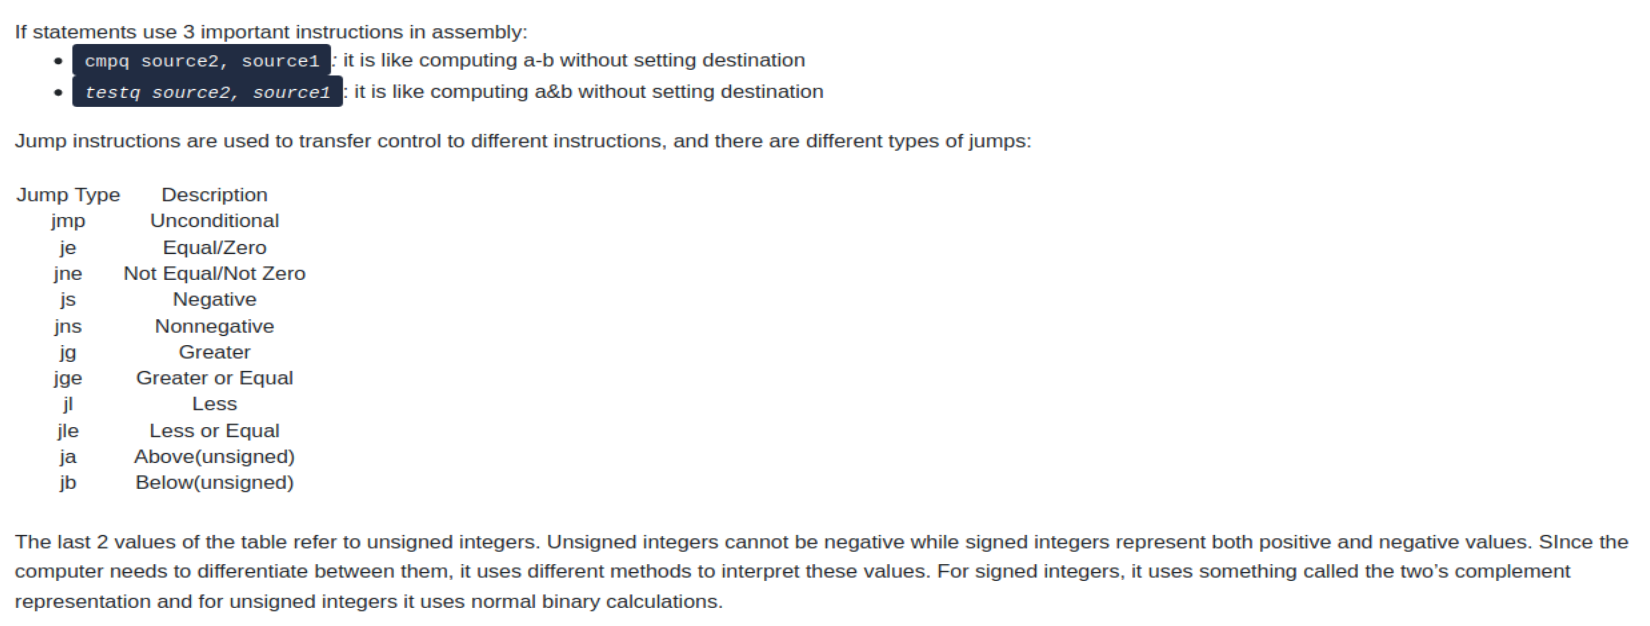
So the conditions are tested using a “compare” and “test” instruction which lead to the use of “jump” to move to the appropriate portion of the conditional to execute. With all of this in mind, this can help answer the questions about the “if2” binary.
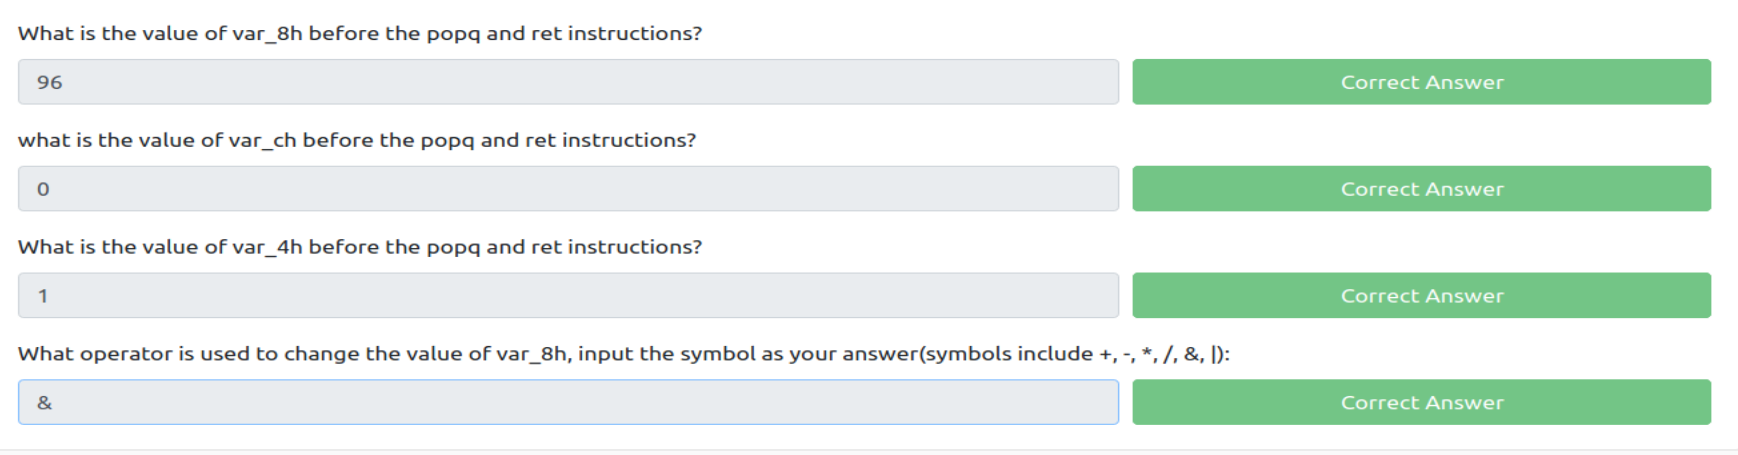
How I arrived to these answers was by setting a breakpoint on the third to last instruction on the main function. This allows you to see all the values of the variables after it hits the conditional. When looking at memory addresses, the value of the variable is in hexidecimal. This requires a conversion to decimal, hence why the answer of question one is “96” even though when we check the position of var_8h it shows “60” in the zero offset of that variable.
Next up, we are going to look at while and for loops in assembely. This is the disassembeled look at the loop2 binary which will be used to answer this sections questions:
If we set a breakpoint at the end of the loop, we can step through the first iteration and hit the same breakpoint on the second iteration. This provides the answer to the first two questions of the challenge, next we set a breakpoint before the popq/retq steps to find the value of var_8h and var_ch before the main function ends. This concludes the eductional portion of this room and the part I would like to write about. Good luck with the two remaining crackme’s ;) .